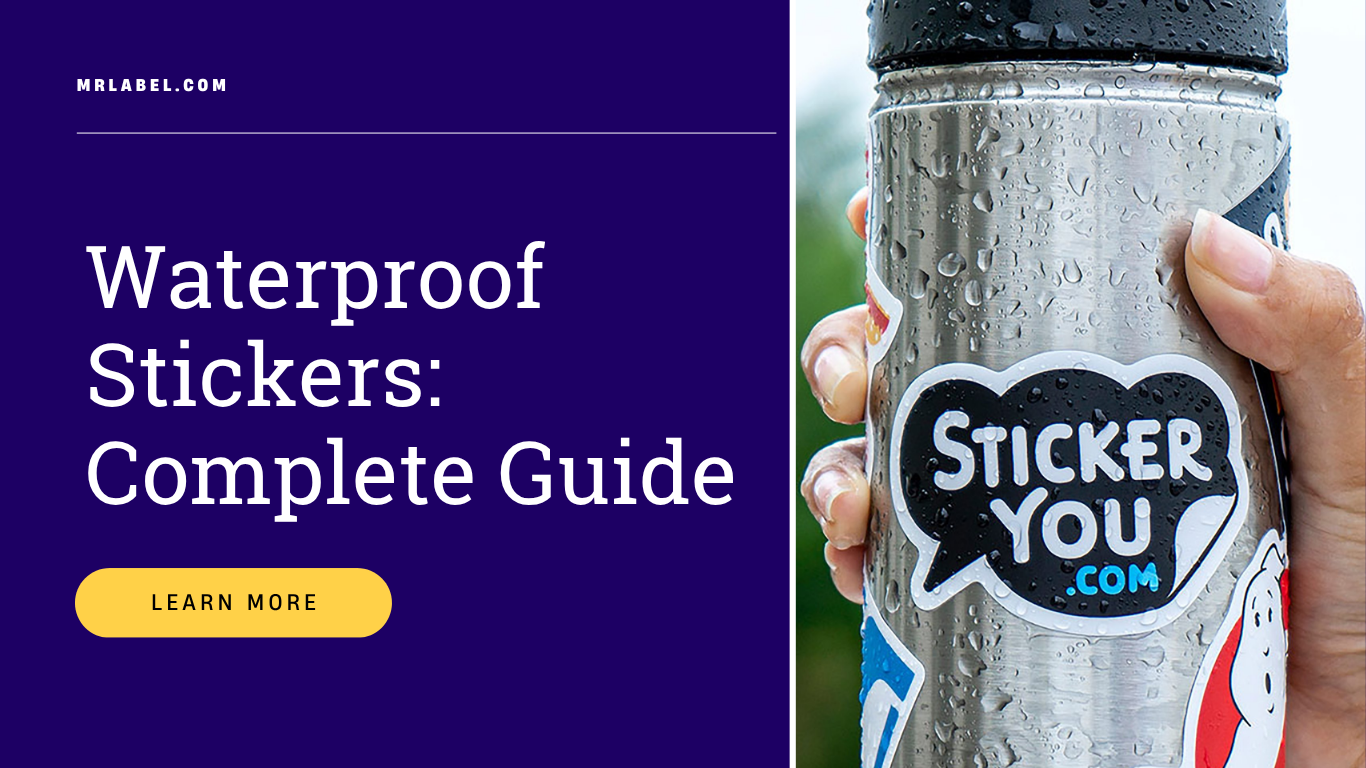
Nobody can deny that stickers are fun and they can be a good way to increase product identity. You can use them on multiple surfaces and they remain in place too. However, one of the primary concerns for long-lasting stickers is the waterproof feature.
If the sticker is not waterproof, the impact of this fun and colorful addition to the label will become a menace.
While stickers can play a role in expressing personality, building brands, or decorating everything from laptops to water bottles, they need to be a waterproof piece on the product. If your product is exposed to moisture, the waterproof feature become even more important.
Waterproofing stickers ensure they last longer, retain their color, and stick securely no matter the conditions. We will discuss how to waterproof stickers, whether you’re printing them yourself or protecting store-bought designs.
Why Waterproof Stickers?
As we mentioned, waterproofing is essential if you want the product label sticker to remain vibrant and good-looking. Moreover, if the product is exposed to water, it has to be waterproof. For any outdoor product or one that is used for traveling, waterproof stickers are the best way to go.
Without waterproofing, stickers can peel off easily and fade, or smearing can make them look bad. Stickers are made of paper so they can bubble or wrinkle easily or they can lose adhesive grip while leaving a mark on the package.
The scratched paper that was once a colorful sticker can seem unsightly and unusable, which is why waterproofing become all the more important.
Here are a few steps that would allow waterproofing:
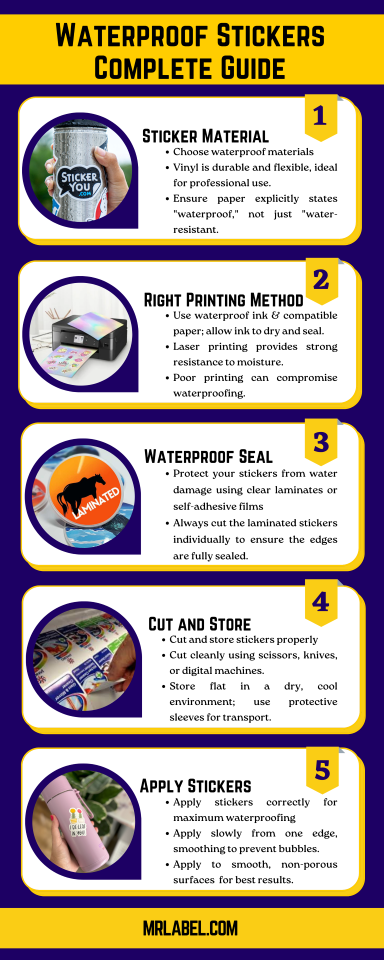 Step 1: Start with the Right Sticker Material
When designing a sticker, make sure to select the right materials that will keep the colors intact and the look remains long-lasting.
Waterproofing starts with the base and we all know that paper is not waterproof, so you have to select a variety that is waterproof or water-resistant material. Some of the common types of water-resistant materials include vinyl, polyester and waterproof printable paper.
Vinyl is naturally water-resistant, durable, and flexible. It’s the most popular choice for professional-quality waterproof stickers. Polyester is another water-resistant option, often used in industrial settings or high-temperature environments.
If you are printing on a small scale or at home, there are special waterproof printable papers available for you.
These usually come with an inkjet- or laser-compatible coating and are often synthetic or plastic-based. Ensure the label specifically says waterproof, not just water-resistant.
Step 2: Choose the Right Printing Method
Even if you have the best base, a poor printing method can destroy the look.
If you do not use a good printer, it can spoil the look of the sticker. Certain types of ink will bleed or run when exposed to moisture, defeating the purpose of using waterproof paper.
The fundamental types of printers are inkjet and laser. If you’re using an inkjet printer, you’ll need to use waterproof ink and waterproof-compatible sticker paper.
Allow time for the ink to dry thoroughly before you begin stacking the labels and seal the design with a protective coating. Many standard inkjet inks are not waterproof on their own.
The coating on the paper helps, but for complete waterproofing, sealing is usually necessary. If you are using a laser printer, toner is vital because it is more water-resistant than inkjet ink.
When paired with synthetic or waterproof label paper, laser printing provides strong resistance to moisture. However, laser printing may not deliver the same color vibrancy as inkjet, especially for photographic or detailed art.
Step 3: Apply a Waterproof Seal
No matter which printing method you use, it is necessary to add a waterproof seal is often essential. The seal will protect both the design and the paper from water damage.
Some of the popular sealing options include clear laminates or self-adhesive laminating film, which are easy to use but go a long way. You can apply these options by simply cutting your printed sticker sheet into manageable sections and then peeling and carefully applying the clear laminate over the entire surface.
Smooth it out with a squeegee or credit card to remove bubbles. You can then cut the stickers individually to seal the edges.
Laminating Machines
For manufacturers and bigger units, creating many products at a time, the printers and label applicators are also bigger. There are numerous kinds of laminating machines which can be of great use.
A thermal or cold laminating machine is more efficient as it can roll clear laminate film over sticker sheets, sealing them uniformly. Thermal laminators use heat to activate the adhesive, while cold laminators use pressure. Cold laminators are safer for heat-sensitive materials like vinyl. Once laminated, the stickers can be cut with scissors or a cutting machine.
Brush-On Sealants
For more control, brush-on sealants like Mod Podge or clear epoxy resin can be applied with a brush or sponge. These work well on thicker sticker materials or textured surfaces.
Keep in mind that some brush-on sealants may yellow over time or show brush strokes, so test a sample before committing to large batches.
Step 4: Cut and Store Stickers Properly
Once your stickers are printed, sealed, and dry, the next step is cutting them cleanly and storing them safely until use. You can use sharp scissors, or knives or even digital cutting machine for precision.
If you’ve laminated your stickers, be sure to cut through both layers carefully. Cutting too close to the edge without sealing the edges can be a problem.
After cutting you can store stickers flat to avoid curling. Ensure to keep them in a dry, cool environment. It is best if you use protective sleeves or envelopes if selling or transporting them. Proper storage ensures the waterproof finish stays intact and your stickers are ready for application at any time.
Step 5: Apply Stickers Correctly for Maximum Waterproofing
Even the most waterproof sticker can fail if applied incorrectly. This is why we always stress upon following the steps thoroughly and using the best materials. Surface preparation and application technique play a major role in longevity. Clean the surface thoroughly with rubbing alcohol or soap and water. Then you should dry the area completely.
Any moisture or oils will prevent proper adhesion. After doing so, peel the backing carefully without touching the adhesive.
Apply slowly from one edge, smoothing as you go to prevent bubbles and press down firmly and allowing the adhesive to set for several hours before exposing to water. Avoid applying stickers to wet, dirty, or porous surfaces if you want them to last. Smooth surfaces like plastic, metal, glass, or sealed wood work best.
Conclusion
Waterproofing stickers are not as secondary as some manufacturers or label designers think. These are integral sticker varieties which can make or break the product image. What separates a fun craft from a functional, long-lasting tool.
Whether you’re creating stickers for personal expression, brand promotion, or product labeling, waterproofing ensures your design stays intact through splashes, spills, and storms.
By starting with the right materials, printing with appropriate inks, and applying protective finishes, you can make your stickers not only beautiful but bulletproof. With a little care and technique, your creations will resist the elements, and stand the test of time. If you’re serious about stickers, then you should be serious about waterproofing as well.

